
Over the years, I’ve binged more cooking shows than I can count. Long before Guy Fieri became the face of Food Network, I was setting up the VCR (yep, VHS tapes) to record culinary trailblazers like Graham Kerr, Ming Tsai, David Rosengarten, and Emeril Lagasse. Back then, recipe storage didn’t mean apps or bookmarks – it meant a shoebox full of 3”x5” index cards.
In other words, I’ve been around the kitchen block a few times.
But here’s the twist – despite all those years cooking, I had never tried sous vide. It’s always been on my culinary bucket list, but I wondered whether it was worth the hype. So, when I finally got my hands on the INKBIRD Sous Vide Cooker ISV-100W, I was eager to see if it could deliver.
Was it the culinary upgrade I was hoping for? Let’s dive in.
Sous Vide 101
Before I get into my experience, a quick explanation.
Sous vide is a method of cooking where you place food (say, a nice ribeye) into a vacuum-sealed bag and then submerge it in a water bath kept at a precise temperature. That’s where an immersion circulator like the INKBIRD comes in – it keeps the water at that exact heat level for as long as needed. The beauty of this approach? Precision. Medium-rare is always medium-rare, never medium-well. And because the food is sealed tight, all those juices and flavors stay locked in. The result? Perfectly cooked, tender, and flavorful food every single time.
First Impressions
When the INKBIRD Sous Vide immersion circulator (or “sous vide machine” to keep it simple) arrived, I was pumped. I’ve tested a fair share of gadgets before, but this one felt different – it was personal.
What’s in the Box (and What’s Not)
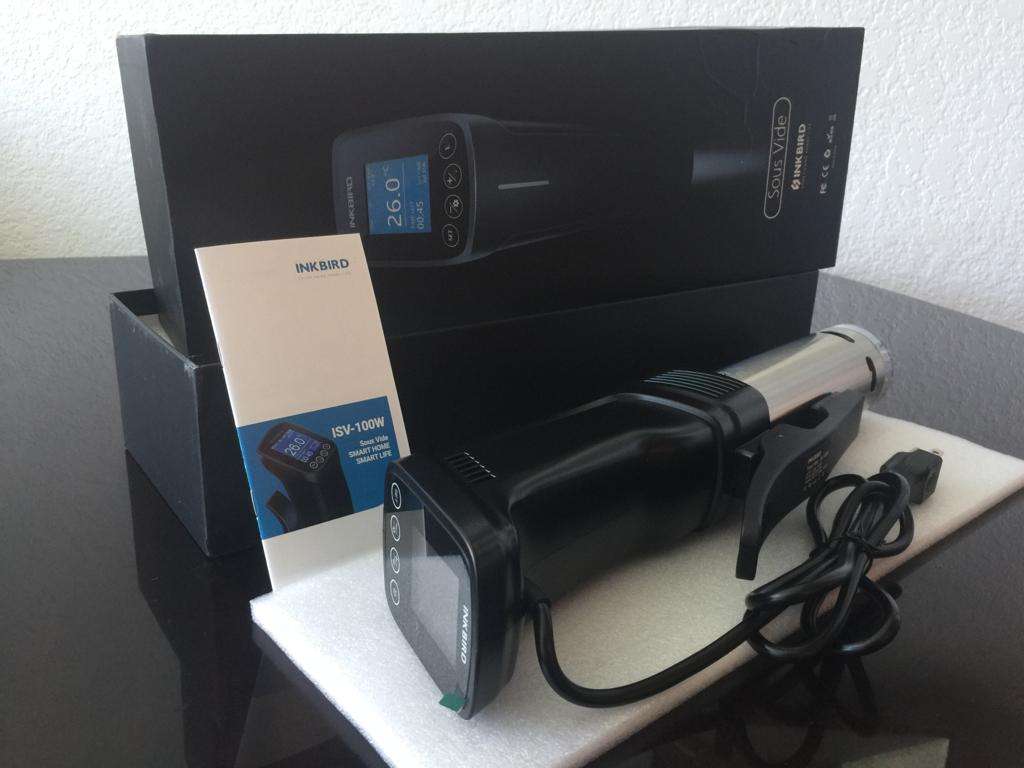
Inside the package, I found the sous vide machine itself, along with a slim instruction booklet and a warranty card. That was it. Honestly, I was kind of hoping for more – maybe a starter recipe guide or even a single vacuum-seal bag to get me going. You know that feeling when you unwrap something exciting only to discover the dreaded “batteries not included” situation? Yeah, it was a bit like that. Not a deal breaker, but definitely a small letdown.
To be fair, INKBIRD never marketed this as a complete “sous vide starter kit,” so I can’t knock them too hard. Still, tossing in at least one disposable bag would have been a nice touch. Since I had none on hand, my enthusiasm briefly fizzled.
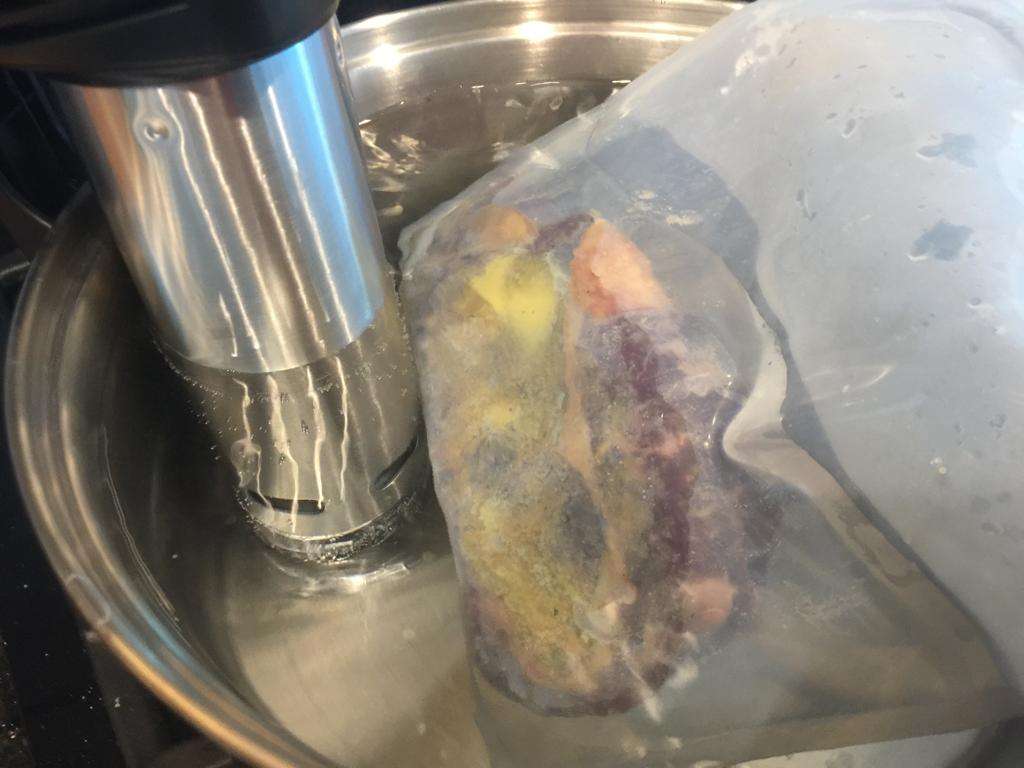
No biggie, though – a quick search for reusable sous vide bags led me to Stasher, a food-grade silicone, resealable option on Amazon. One click later, it was on my doorstep the next day (thanks, Prime). It worked like a charm, and honestly, I’ll probably stick with reusable bags moving forward anyway.
The Sous Vide Machine Itself
The first thing I noticed? It’s bigger in person than it looks in the product photos. Not in a clunky way, more in a “solid, professional tool” kind of way. It has a nice heft to it, giving off that heavy-duty vibe that makes you feel a little more like a pro in the kitchen. (Step aside, Bobby Flay – I’ve got this.)
The design is sleek, with the controls housed in a sturdy black casing that feels built to last. A large, durable clip attaches firmly to just about any pot you plan to cook in. The immersion end looks like a polished stainless steel wand – very clean and modern.
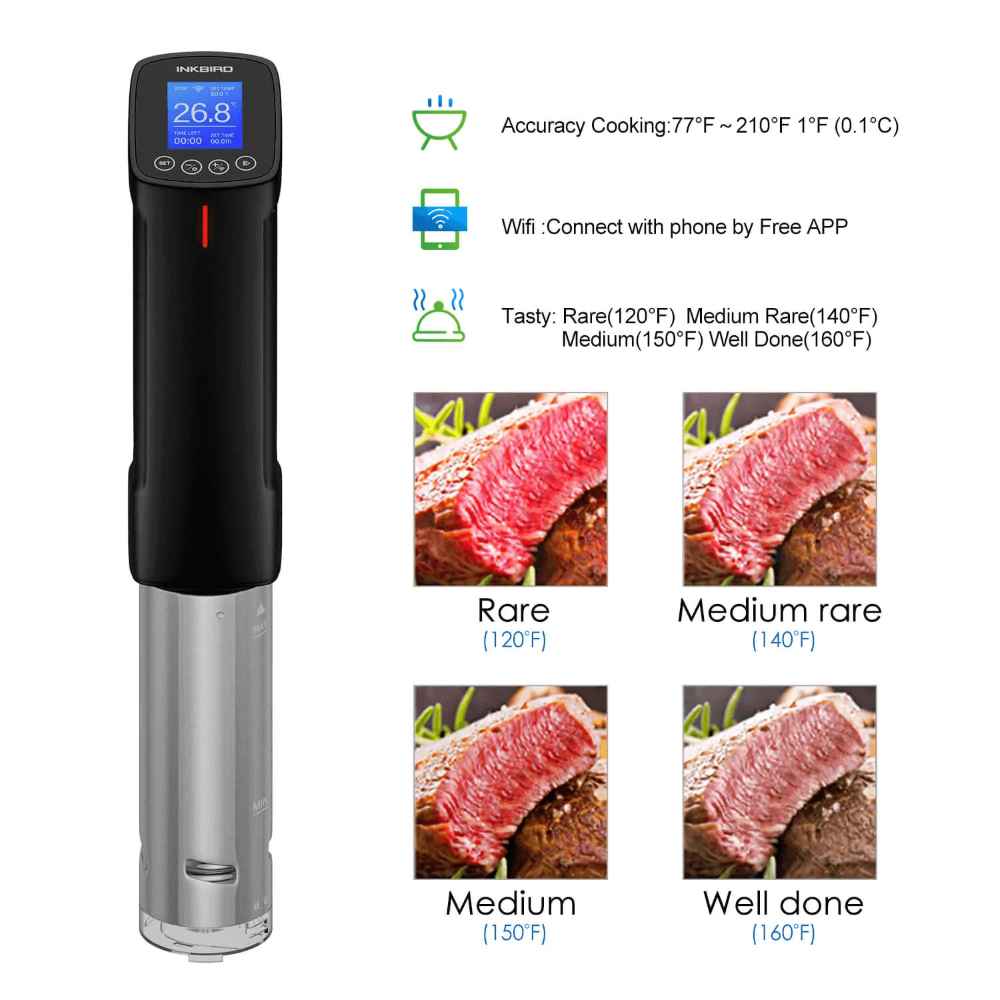
As for the specs, the INKBIRD offers a temp range from 25°C to 99°C (77°F to 210°F) with an accuracy of 0.1°C (1°F). You can also run it for up to 99 hours and 59 minutes, which is more than enough for everything from a 1-hour egg to a multi-day brisket. With the setup ready and my trusty new Stasher bag in hand, it was finally time for the fun part: cooking.

From Good to Amazing in 1 Hour
I’d been building up to this moment for a long time.
For my first sous vide adventure, the choice was obvious: steak. And not just any steak – a thick, nearly two-inch, one-pound organic ribeye. If I was going to put this technique to the test, it had to be with something worthy. Go big or go home, right? To make it fair, I grabbed a second ribeye of the exact same size to cook the old-school way: pan-seared on the stove. I’ve been told more than a few times that I turn out a pretty great steak, so this would be a genuine head-to-head: my trusty stovetop method versus the INKBIRD Sous Vide Cooker.

While the ribeyes rested at room temperature after seasoning (pro tip: throwing cold steaks straight into heat makes the muscle fibers tense up, which leads to uneven cooking), I flipped through the little instruction booklet. Yes, I’m one of those people who actually reads the manual before diving in. Luckily, this one was short and sweet.
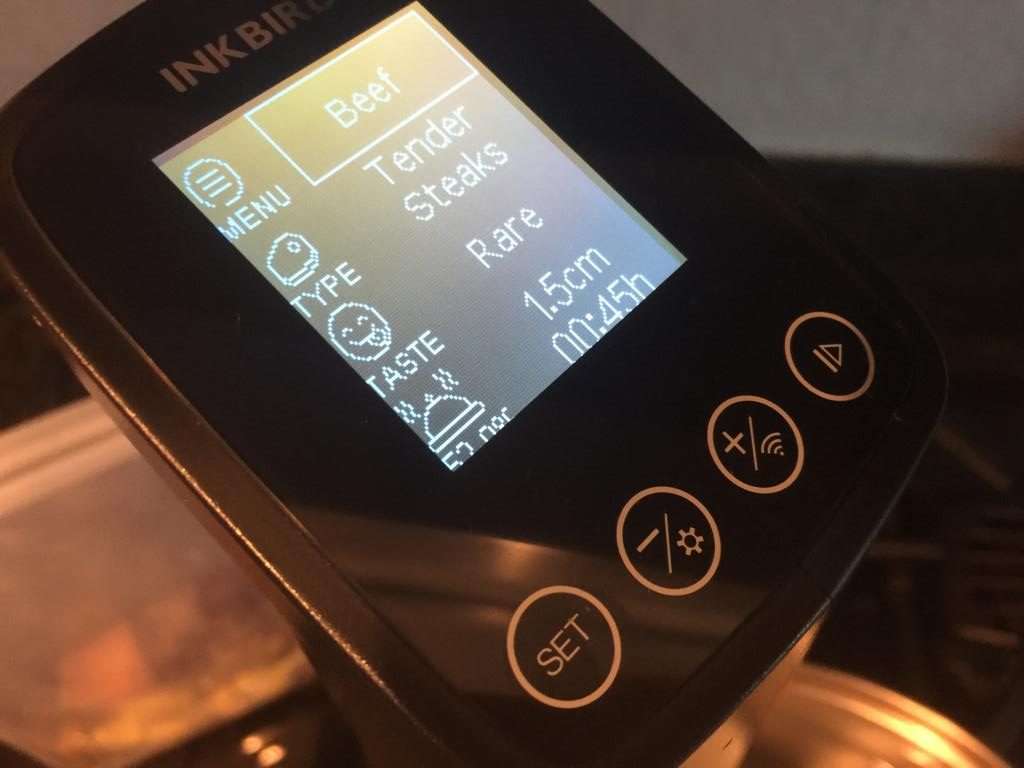
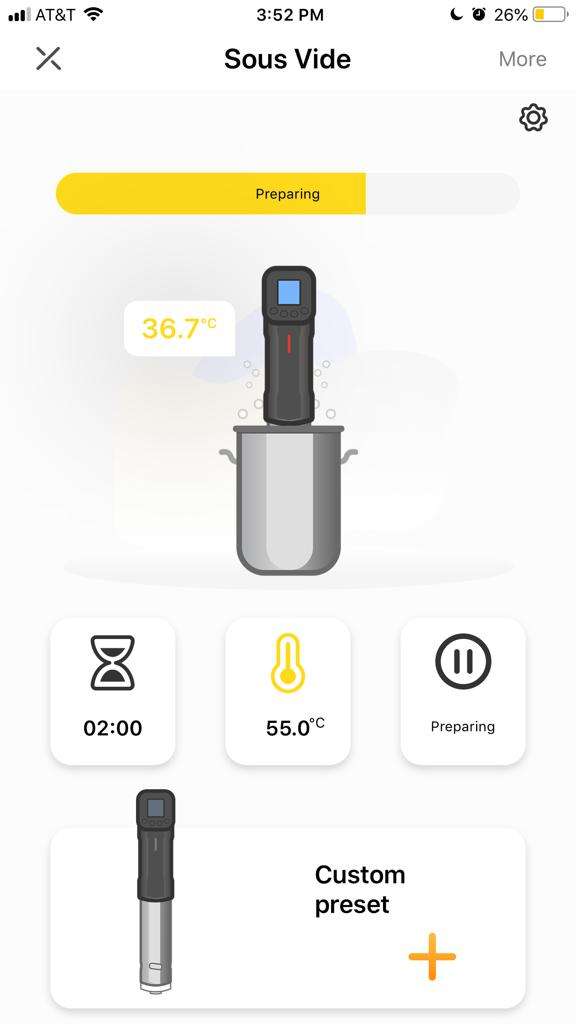
The INKBIRD Sous Vide ISV-100W can be run directly from its LCD panel or through a companion app. Setting up the app was painless, and before I knew it, I was controlling a cooking machine with my phone. For someone who grew up with VHS tapes and index card recipes, that felt pretty wild.
What really impressed me was the precision – I could monitor the exact water temperature in real time from my screen. After looking up the proper settings for a medium-rare 2-inch ribeye, I discovered INKBIRD had already done the homework for me. All I had to do was select “steak” from the built-in menu. Nice and simple.
Let the Enjoyment Begin
Since I don’t own a vacuum sealer (yet), the whole “vacuum-sealed bag” part of sous vide presented a small hiccup. But hey, where there’s a will, there’s a workaround. Consider it a little kitchen hack in action.
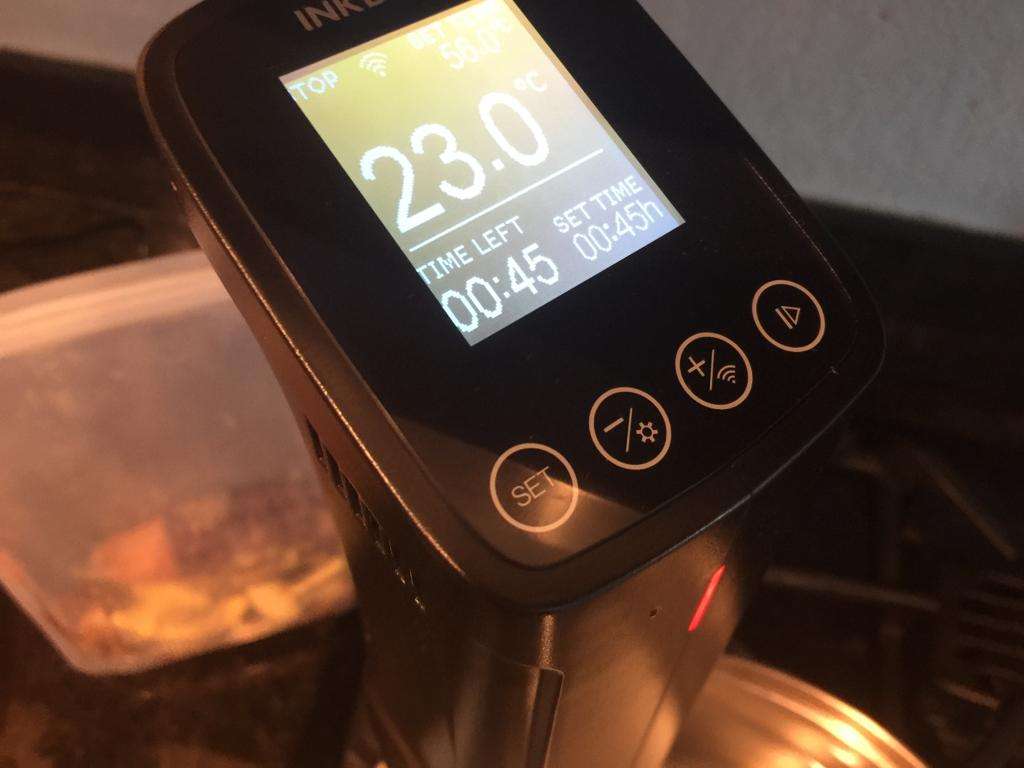
Once the water hit the target temp – 131°F / 55°C – it was time to bag the steak. Since I didn’t have a vacuum sealer, I went with the trusty water immersion method.
Here’s how it works: I slipped the steak into the bag, kept the top open, and slowly lowered it into the water. As the bag sank, the pressure of the water naturally forced the air out, hugging the steak nice and tight. By the time the waterline was about an inch from the top, most of the air was gone, and I sealed it up. To finish, I propped the bag so the seal stayed high and dry above the surface, then let the ribeye bathe away for the next 45 minutes.
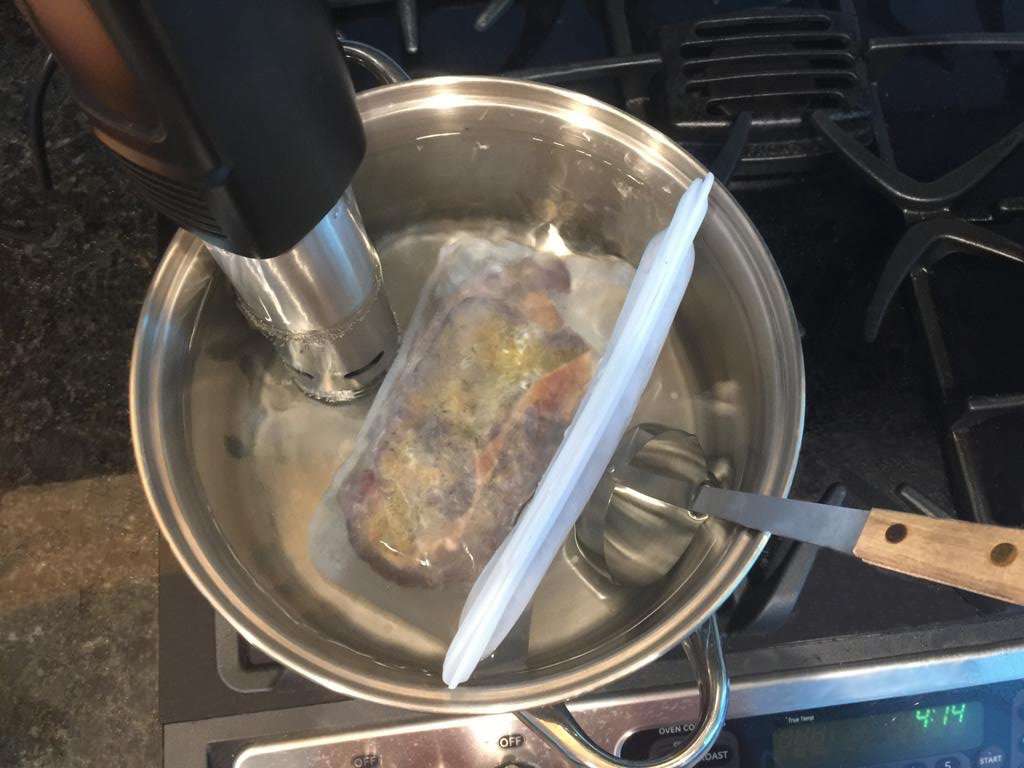
 Here’s a little hack/tip you heard here on Focus9x.com – let’s dub it the Tom Grow Ladle Hack.
If you’re struggling to keep your bagged food submerged while still keeping the top above water, try this. Position the bag exactly where you want it, then wedge a ladle between the bag and the side of the pot. The pressure gently pushes the steak toward the sous vide machine on the opposite side, holding everything neatly in place. Worked like a charm – no need to waste money on special weights or gadgets to keep the bag down.
Lazy Cooking
This machine is quiet. Almost eerily so. Technically, I was “cooking,” but it hardly felt like it. Just a faint hum (you had to really listen for it), a pot of water on the stove, and a steak sealed in a bag taking its warm bath. No burners going. No exhaust fan roaring. No sizzling aromas filling the kitchen. The only sound was the clack of my keyboard as I typed away at the table. And yet – this was me cooking. Wild, right?
After 45 minutes, I shut off the machine and pulled the steak from its bag. By touch, I could already tell it was medium-rare. Technically, the steak was fully cooked at this point – but let’s be real, it wasn’t exactly Instagram-ready. What came out was a sort of grayish slab of beef. Not appetizing in the looks department. Luckily, I knew this was totally normal thanks to all those “one day I’ll try sous vide” videos I’d watched. Ugly as heck? Absolutely. But beneath that drab exterior, it was clearly tender and juicy. So far, so good.


Sear You Later
This was the part where I rolled up my sleeves – time to give the steak its golden crust. I heated a heavy pan, dropped in a generous spoonful of ghee, and cranked the heat as high as it would go. The moment that steak hit the pan, the sizzle was pure music. I seared each side, basting with the buttery juices before and after the flip. (One flip only – that’s my rule.)
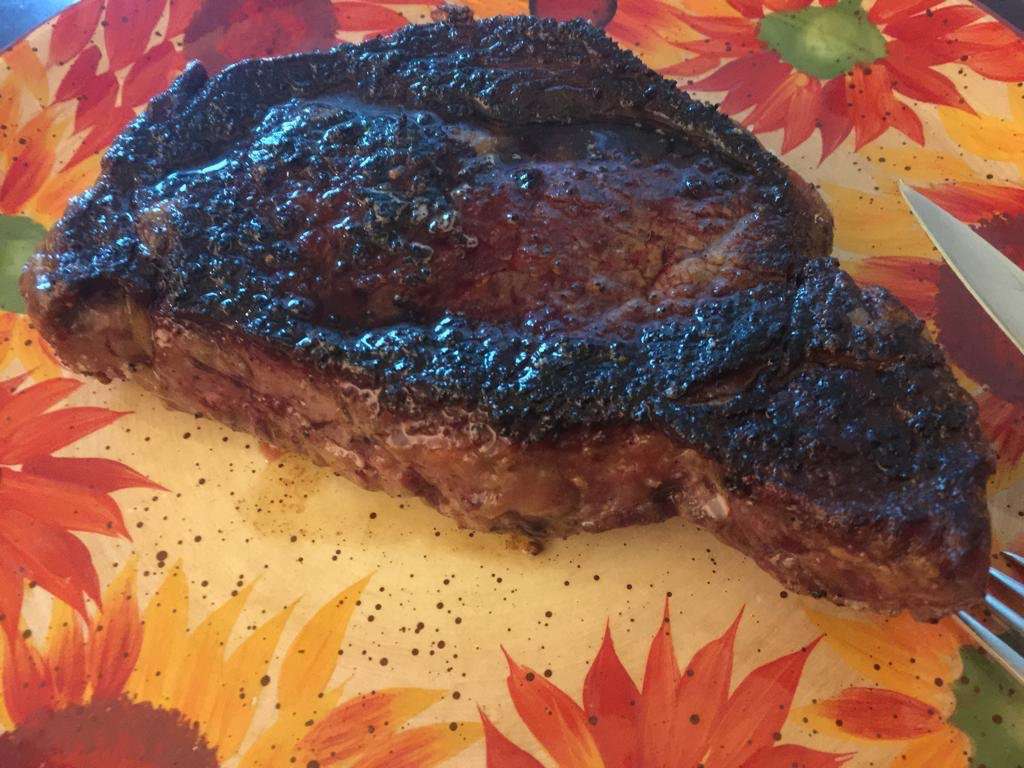
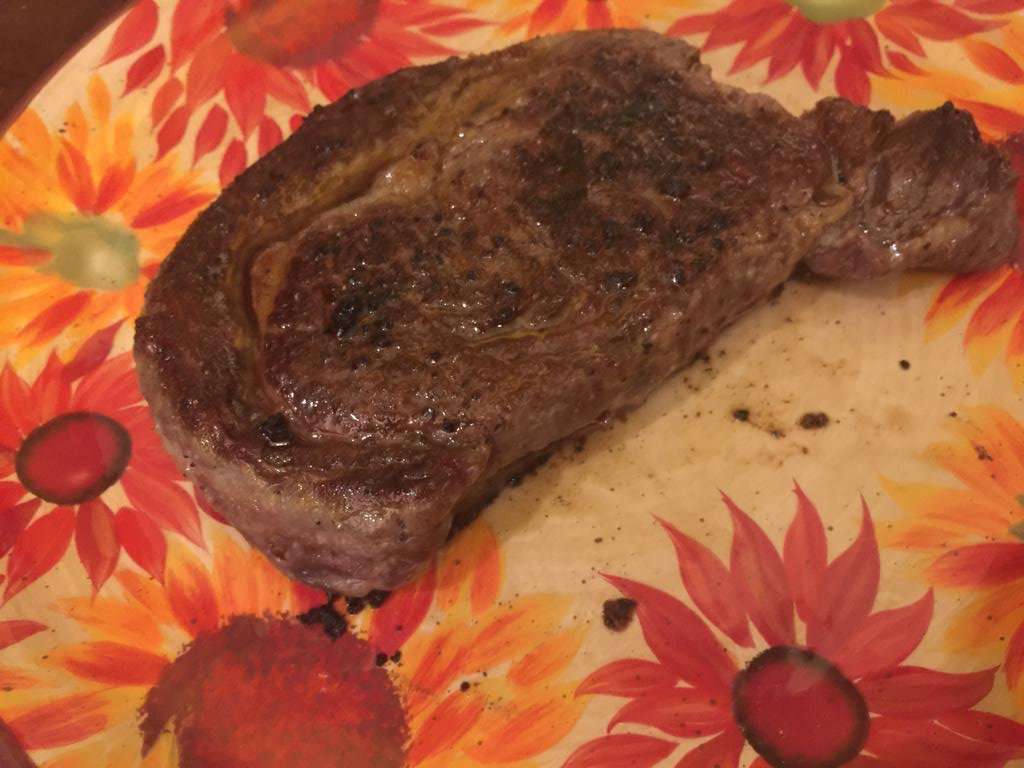
Suddenly, the quiet kitchen transformed. Smoke, aroma, and that lively crackle of high-heat cooking filled the air. Now it felt like cooking. The beauty of sous vide is that the steak was already cooked perfectly inside. All I had to focus on was the sear. I had to keep reminding myself of that so I wouldn’t get carried away and overcook it. By the time I was done, the ugly gray hunk from the bag had transformed into a picture-perfect steak with a crisp, caramelized crust. Relief.
Meanwhile, my control steak was sizzling away on the stove using my usual method. Once both were done, they practically begged to be tasted. Tough job, but hey – someone’s gotta do it.
The Taste Test and Verdict
WOW! That Looks Good!
Placed side by side, the steaks looked nearly identical at first glance. The control steak did have a slightly nicer sear, which made sense – it had spent more time directly on the hot pan. But otherwise, it was hard to tell them apart..
This was my very first sous vide cook, and it felt strange starting with a steak that was already fully cooked. I’m used to tossing raw meat on a hot pan, so knowing it was “done” made me a little overcautious. I didn’t sear it as long as I probably should have, worried I’d push it from medium-rare into medium. Ideally, I should have gone hotter and faster, but my ultra-sensitive smoke detector kept setting off alarms – which in turn freaked out my dogs – so I had to dial the heat back.
Meanwhile, the control steak naturally spent more time in the pan since it started raw and needed to cook through. That gave it a slight edge on sear. Honestly though, I’ll take a mulligan here. The difference was mostly due to rookie hesitation. (For the record, I cooked another sous vide ribeye just a few hours later, armed with my lessons learned, and nailed the sear that time.)
Great No Matter How You Slice It
Here’s where things got interesting.
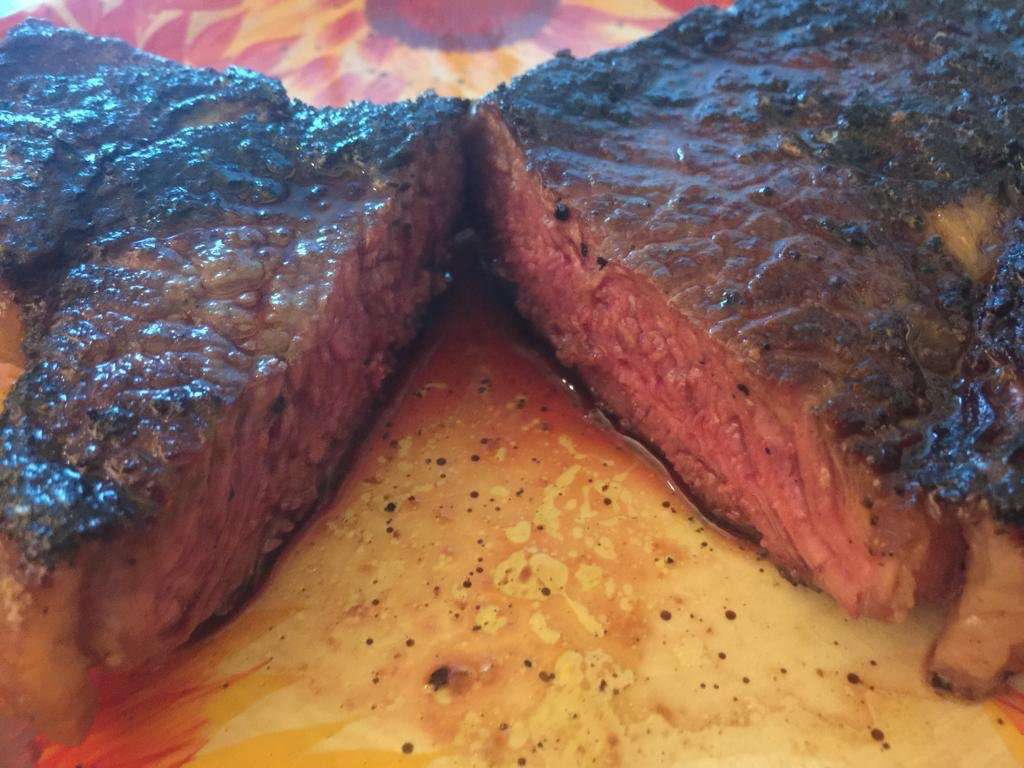
Cutting into the two-inch steaks immediately highlighted their differences. The control steak, cooked to a textbook medium rare, had a browned crust leading into a pink interior, with the color gradually deepening to a redder core. The sous vide steak, in contrast, revealed a uniform pink from edge to center, with a sharper boundary between the seared exterior and the interior. The control showed more browning overall – more signs of traditional doneness, whereas the sous vide came out with a cleaner, more even appearance. From a purely visual perspective, the sous vide clearly had the edge, even though I’ve spent far more time with conventional cooking than with this newer method. Both were appealing, but in terms of presentation, sous vide wins.
When it came to slicing, both offered little resistance, gliding under the knife like softened butter. Still, the sous vide steak edged ahead again, yielding with slightly less effort. Its texture was more tender, a result of proteins breaking down gently during the low-and-slow cooking process. I only gave it the standard 45-minute sous vide treatment this time, but next round I plan to extend it to one to four hours for an even silkier bite.
Alright, enough suspense – let’s talk taste! Cue the drum roll.
First up, the control steak. It was everything you’d expect from a well-cooked medium rare: seasoned just right, juicy, and satisfying with every bite. A solid performance – no complaints there.
Then came the sous vide. One bite in and… wow. Honestly, “wow” is the only word that fits. The juices exploded across my palate, the flavor felt more dialed-in, and I caught myself making an involuntary “mmm” like I was in a food commercial. The difference wasn’t earth-shattering, it didn’t taste like an entirely different steak, but it was undeniably better. A touch more flavor, noticeably more tenderness, and so much extra juiciness all stacked together. If this was the result after just 45 minutes, I can only imagine what an hour or more would do. Pure flavor fireworks.
Honestly, I might have to hit up our content coordinator next time and see if I can review a better camera – or maybe even a new phone, because these shots just don’t do the steak justice. Funny thing is, the ribeyes themselves weren’t as well-marbled as the cuts I usually go for, yet you’d never know it once I took a bite. They practically dissolved in my mouth. Absolutely incredible.
Grass-fed, grass-finished – call it what you like. What I forgot to mention earlier is that these ribeyes were the latter. The difference? “Grass-fed” typically means cattle eat grass for most of their lives but finish on grain, which pumps up that gorgeous marbling ribeyes are famous for. “Grass-finished” means no grain ever enters the picture, and the result is a leaner cut with little to no marbling. Wanting to eat a bit cleaner, I reluctantly went with the grass-finished option.
I was bracing myself for a letdown – less fat usually means less flavor, but sous vide had other plans. The steak turned out just as juicy as some of the most luxuriously marbled, grain-fed ribeyes I’ve ever tasted. Flavorful, tender, and shockingly satisfying. Now I’m tempted to experiment with tougher, leaner cuts and see if sous vide can scratch my ribeye itch without the ribeye price tag. If it pulls that off, I’m awarding sous vide a perfect score in my book.
Good, the Bad, and the Delicious
Let’s start with the drawbacks – though they’re pretty small. It would be nice if INKBIRD tossed in at least one ready-to-use vacuum bag, plus a little starter recipe guide to help new users dive in without falling down a YouTube rabbit hole. The instruction manual could also use a boost in detail. For instance, it mentions calibration, but never explains when or why you’d need to do it. A bit more clarity there would go a long way.
Now, the upsides? Plenty. Beyond the obvious advantages of sous vide cooking, the ISV-100W itself feels rock-solid – hefty, well-built, and clearly made to last. Both the physical interface and the companion INKBIRD app are refreshingly intuitive. It hums along quietly, holds temperature with precision, and delivers consistent results every time. And the real kicker? The applause you’ll get from dinner guests. Just remember, save me a seat.
Final Thoughts
If you’re serious about elevating your cooking game, the INKBIRD Sous Vide ISV-100W belongs in your kitchen. Sous vide gives you a perfectly consistent base to work from, freeing you to focus on those finishing touches that transform a dish from good to unforgettable. The real magic lies not only in flavor, but in the precision and reliability that make this technique a favorite among Michelin-starred and James Beard–winning chefs.
Ready to give your home cooking a professional edge? The ISV-100W is your ticket. At just $92.99 on Amazon (yes, with free Prime shipping), you’re essentially getting pro-level culinary tech with a French pedigree at a fraction of the price the big names pay. Try it once, and you’ll never look at “just a steak” the same way again.